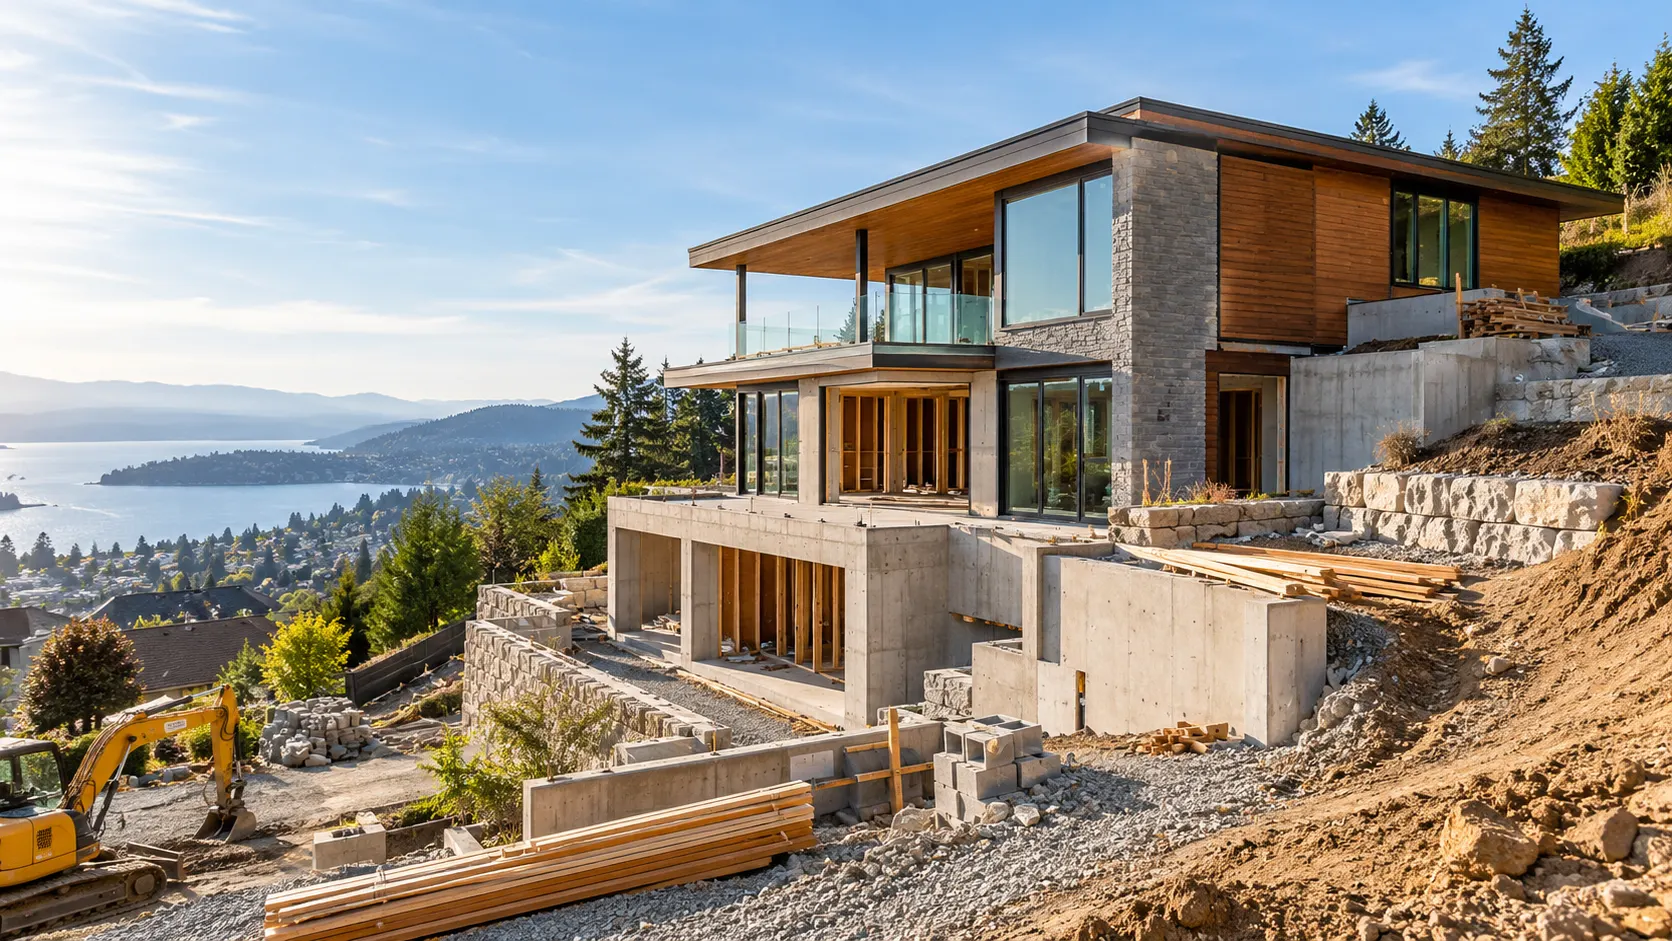
Building a house on a sloping site can create opportunities that a flat plot cannot offer. Elevated views, split-level layouts and a home that follows the landscape can all make the finished property distinctive. However, a slope can also affect foundations, drainage, access, retaining structures and the overall construction budget.
Every sloping plot is different. The gradient, soil conditions, access, drainage and proposed design all influence what will be required. This guide explains the main issues to consider before building on sloping ground.
Start With a Proper Assessment of the Site
Before developing the design in detail, understand the land itself. A topographical survey establishes levels and contours across the plot, helping the design team see how much the ground rises or falls and where the house may sit most effectively.
Ben from Pristine Building Solutions says “Ground conditions matter just as much. Depending on the plot and the information already available, investigation may be needed to understand the soil, groundwater and bearing conditions.” These findings can influence the foundation design, retaining structures and drainage strategy.
Also consider how water moves across the site, where services are located and how construction vehicles will reach the building area. Early answers make it easier to design around genuine constraints.
How the Gradient Influences the Design
A slight fall across a site may require relatively modest adjustments. A more pronounced slope can have a much greater influence on the layout and structure of the house.
Establish the actual difference in level across the building footprint and the direction of the slope. A plot that rises behind the house can create different access and drainage issues from one that falls away from the road.
A good design should respond to these levels. In some cases, creating a flat building platform may be appropriate. On other plots, split levels or stepped floor levels may reduce excavation and create a more interesting home.
Construction input while the design is developing can help reveal the implications of excavation, retaining walls and structural work.
Excavation, Retaining Walls and Groundworks
Creating a level building area on sloping ground often involves excavation. Soil may be removed from the higher part of the site and, where suitable, reused elsewhere on the plot to adjust levels.
The amount of earth moved can have a major effect on cost because excavation, disposal and imported fill all add expense.
A design that limits unnecessary ground movement can therefore be beneficial. This does not mean avoiding excavation altogether; it means understanding where it adds value and where the natural levels can be retained.
Retaining walls may also be required where there are significant level changes. Their design depends on factors including height, ground conditions, loads and drainage, so structural advice should be obtained where appropriate.
Foundations on a Sloping Site
There is no single foundation type that is right for every sloping plot. The correct solution depends on the proposed building and the findings from the site and ground investigations.
Possible approaches include stepped, reinforced concrete or piled foundations. Generic rules can be misleading: the correct solution depends on the building and the ground beneath it.
A structural engineer can design the foundations around the loads from the building and the actual ground beneath it. Establishing this early also gives the builder and client a much more reliable basis for budgeting.
Drainage and Water Management
Water management deserves particular attention on a slope because rainwater naturally travels towards lower ground and construction can alter existing drainage patterns.
The drainage strategy should therefore be part of the overall design rather than an afterthought. Depending on the project, this may include surface-water drainage, land drains, suitable falls, drainage behind retaining structures and measures around walls that are partly below ground level.
Where the home is built into the slope, waterproofing and below-ground details need careful specification. Good drainage also helps control runoff and erosion.
Access and Construction Logistics
Site access can be one of the less obvious challenges. A finished driveway that works perfectly for a car may not provide suitable access for excavation machinery, delivery vehicles or lifting equipment during construction.
Before work starts, consider how materials will reach the building area, where they can be stored and whether plant can manoeuvre safely. Restricted access can affect the construction programme and may influence how certain stages of work are carried out.
On plots with narrow entrances or steep approaches, early planning helps identify practical solutions before deliveries and groundworks begin.
Designing a Home That Works With the Slope
The slope does not have to be treated purely as a problem. It can become one of the strongest features of the design.
Split-level accommodation can allow different parts of the house to follow the natural ground. On plots that fall away, living areas can sometimes be positioned to make the most of views and daylight, while lower levels may suit bedrooms, utility spaces, garages or other accommodation.
Glazing, terraces and balconies may also suit elevated sites, subject to planning, privacy and structural considerations. Architectural ambition should be balanced with buildability because complex features can increase engineering and construction costs.
Planning and Building Regulations
A new home will normally require planning permission, and a sloping site may introduce additional considerations. These can include the height and massing of the building, changes to ground levels, overlooking, access, landscaping and the visual impact of retaining structures.
Planning permission and Building Regulations are separate processes, and additional surveys or specialist reports may be required. Establishing likely requirements early can help avoid unnecessary revisions.
Budgeting for a Sloping-Site Build
It is reasonable to expect a sloping site to introduce costs that might not arise on a straightforward flat plot, but there is no reliable fixed amount that can be added to every project.
The additional cost depends on what the site actually requires. Major excavation, difficult access, retaining walls, complex foundations, drainage works and structural engineering can all influence the budget. A well-considered design that follows the natural ground may help avoid some unnecessary work.
Separate the normal house specification from site-specific costs when budgeting. A contingency is also sensible, but the allowance should reflect the information available and the risks of the individual site rather than a universal percentage.
Choosing the Right Builder and Project Team
Building on a challenging plot requires good communication between the client, architect, structural engineer, other consultants and the construction team.
When choosing a builder, look beyond the headline quotation. Ask how access, groundworks, drainage, structural details and coordination with the wider design team will be handled.
Pristine Building Solutions works on bespoke new builds and self-build homes across Sheffield, Rotherham and the surrounding South Yorkshire area. The team can manage projects from the early planning stages through to completion, coordinating with architects, surveyors and other professionals where required.
Questions to Ask Before Buying a Sloping Plot
Before committing to a site, consider:
How much does the land fall across the proposed building area?
Has a topographical survey been completed?
What is known about the ground and groundwater conditions?
Will significant excavation or retaining structures be required?
How will surface water be managed?
Is there practical access for machinery and deliveries?
Where are the main utility connections?
Are there planning constraints that could affect the design?
Has the budget allowed for site-specific structural and groundworks costs?
These questions can reveal whether a plot needs further investigation before significant time and money are committed.
Final Thoughts
Building a house on a sloping site can be more complex than working with a level plot, but it can also lead to an exceptional home. Successful projects generally start by understanding the site properly and allowing the design to respond to it.
Topographical information, ground investigation, structural input and drainage planning help turn uncertainty into informed decisions. The aim should be a home that makes practical and architectural sense for the plot.
If you are considering a sloping plot in Sheffield, Rotherham or the surrounding area, Pristine Building Solutions can provide practical construction input and help you understand the issues that may affect the build before work begins.
Tu proyecto merece ser visto. En Videocontent, productora audiovisual Madrid , transformamos tus ideas en vídeos que inspiran y conectan. ¡Escríbenos y empieza a destacar hoy mismo!
Disegnatorecad.net is a company with over 15 years of experience in the 3D and architectural sector. The company has extensive experience in 3D rendering plastici architettonici f you are interested in having an architectural model created, contact Disegnatorecad.net to achieve the best possible result.
Tu proyecto merece ser visto. En Videocontent, productora audiovisual Madrid , transformamos tus ideas en vídeos que inspiran y conectan. ¡Escríbenos y empieza a destacar hoy mismo!
Disegnatorecad.net is a company with over 15 years of experience in the 3D and architectural sector. The company has extensive experience in 3D rendering plastici architettonici f you are interested in having an architectural model created, contact Disegnatorecad.net to achieve the best possible result.
What Actually Slows Railing Installations Down in the UK
I’ve watched dozens of projects run long.
Here are the real reasons — not the ones installers put in a polite email.
1. The substrate isn’t ready
If your concrete bases haven’t been prepared, your brickwork isn’t in, or your balcony slab isn’t finished — the installer can’t start.
Sounds obvious.
Happens all the time.
2. Weather
The UK is the UK.
Working at height in wind and rain isn’t just unpleasant — it’s a safety risk.
Winter installs on exposed sites can lose days to weather.
Build this into your programme if you’re planning an autumn or winter installation.
3. Last-minute design changes
You decide mid-fabrication that you want horizontal rails instead of vertical.
Or a different post cap.
Or your partner wants the finish changed from satin to mirror polish.
Every change at fabrication stage restarts part of the process.
Lock in your design before the fabricator starts.
4. Access problems
Tight roads, no parking, restricted site access.
A delivery lorry that can’t get close to the property.
Scaffolding that needs erecting before upper-level work can start.
These are things to solve before the installer arrives — not on the day.
5. Waiting on building control or permits
For commercial projects, certain stages may require inspection before you can proceed.
If building control isn’t booked in advance, you can wait days for an available slot.
6. Multiple trades on site
If your installer is the last trade in and the builders are still there, things get messy.
Conflicts over access, sequencing, work areas.
Railings ideally go in towards the end of the build — but with the fabrication ordered early enough that the lead time doesn’t hold everything up.
The South East England Reality Check
I’ll be straight with you about our corner of the country.
The south east — Kent, Surrey, Sussex, parts of Hampshire — has some of the busiest and most in-demand fabricators and installation teams in the country.
London’s commuter belt means constant residential development.
Coastal properties mean constant renovation and upgrade work.
Demand is high. Good teams are booked out.
Here’s what that means practically:
Lead times from top fabricators are often 4–8 weeks for bespoke work, not the 2–3 weeks you might hope for
Labour costs run 10–25% higher than the national average — as do scheduling pressures
Don’t assume you can get anyone good next week — if your project has a firm deadline, book as early as possible
I’ve seen projects stall because a homeowner assumed a 2-week turnaround and their fabricator of choice couldn’t start for six weeks.
Book early.
Confirm lead times in writing.
Get a programme from your installer that shows every stage.
How to Cut Your Railing Installation Timeline Without Cutting Quality
You can speed things up without compromising the result.
Here’s how:
Make all design decisions before the survey visit
Know what material you want.
Know your preferred finish.
Have reference photos ready.
The more decided you are before the surveyor comes, the faster the quote and sign-off process.
Consider off-the-shelf systems for simpler runs
For straightforward garden perimeter railings or simple balcony balustrades, off-the-shelf modular systems can be installed far faster than bespoke fabrications.
No fabrication lead time.
Order, deliver, install.
For a project where aesthetics don’t demand a custom design, this is a legitimate time-saver.
Prepare your site before the installer arrives
Post bases dug.
Access confirmed.
Other trades cleared from the work area.
An installer who arrives to a ready site can start immediately.
Book your installer and fabricator at the same time you sign off the design
Don’t wait for the design to be perfect before you reserve a slot.
You can adjust minor details later.
But if you wait for a perfect set of drawings before calling the installer, you’ve lost weeks in the diary.
Give clear, written briefs
Don’t rely on conversations and assumptions.
Written confirmation of material, finish, dimensions, fixings, and schedule means everyone is aligned.
Changes in writing mean no surprises.
What Actually Happens on Installation Day
Let me walk you through what a typical domestic installation day looks like.
Knowing this helps you manage your day and not get in the way.
Morning — arrival and set-up (1 hour)
The team arrives.
They unload materials, set up tools, do a final site check.
They’ll confirm substrate conditions before committing any fixings.
Mid-morning — post setting and base fixing (2–4 hours)
If posts are going into concrete bases, this is the most time-intensive part.
Drilling, setting posts true and plumb, checking heights.
For surface-mounted systems, this is faster — bolted directly to a finished slab or deck surface.
Afternoon — infill and rail fitting
Balusters, infill panels, or glass go in once the post structure is secure.
Top and bottom rails are fixed.
The team work down the run systematically.
Late afternoon — finishing and checks
Final fixing of any cappings, post tops, end caps.
Full walk-down to check alignment, load test fixings.
Handover and site clean-up.
For a straightforward job on a prepped site, this whole process runs inside one day.
Do Building Regulations Affect the Timeline?
Worth covering this because it catches people out.
For most domestic railing projects — garden railings, balcony balustrades, handrails — you don’t need building control sign-off as a separate process.
The regulations (Approved Document K and BS 6180:2011) are the responsibility of the installer to meet.
Your installer should be building to these standards as standard practice.
However, building control gets involved when:
The project is part of a notifiable building works application (larger builds, extensions, new builds)
You’re in a commercial building or multi-occupancy property
Your local authority requires notification for the specific work type
If your project falls into any of these categories, factor in lead time for building control booking and inspection.
It doesn’t add huge amounts of time — but it does need to be in the programme.
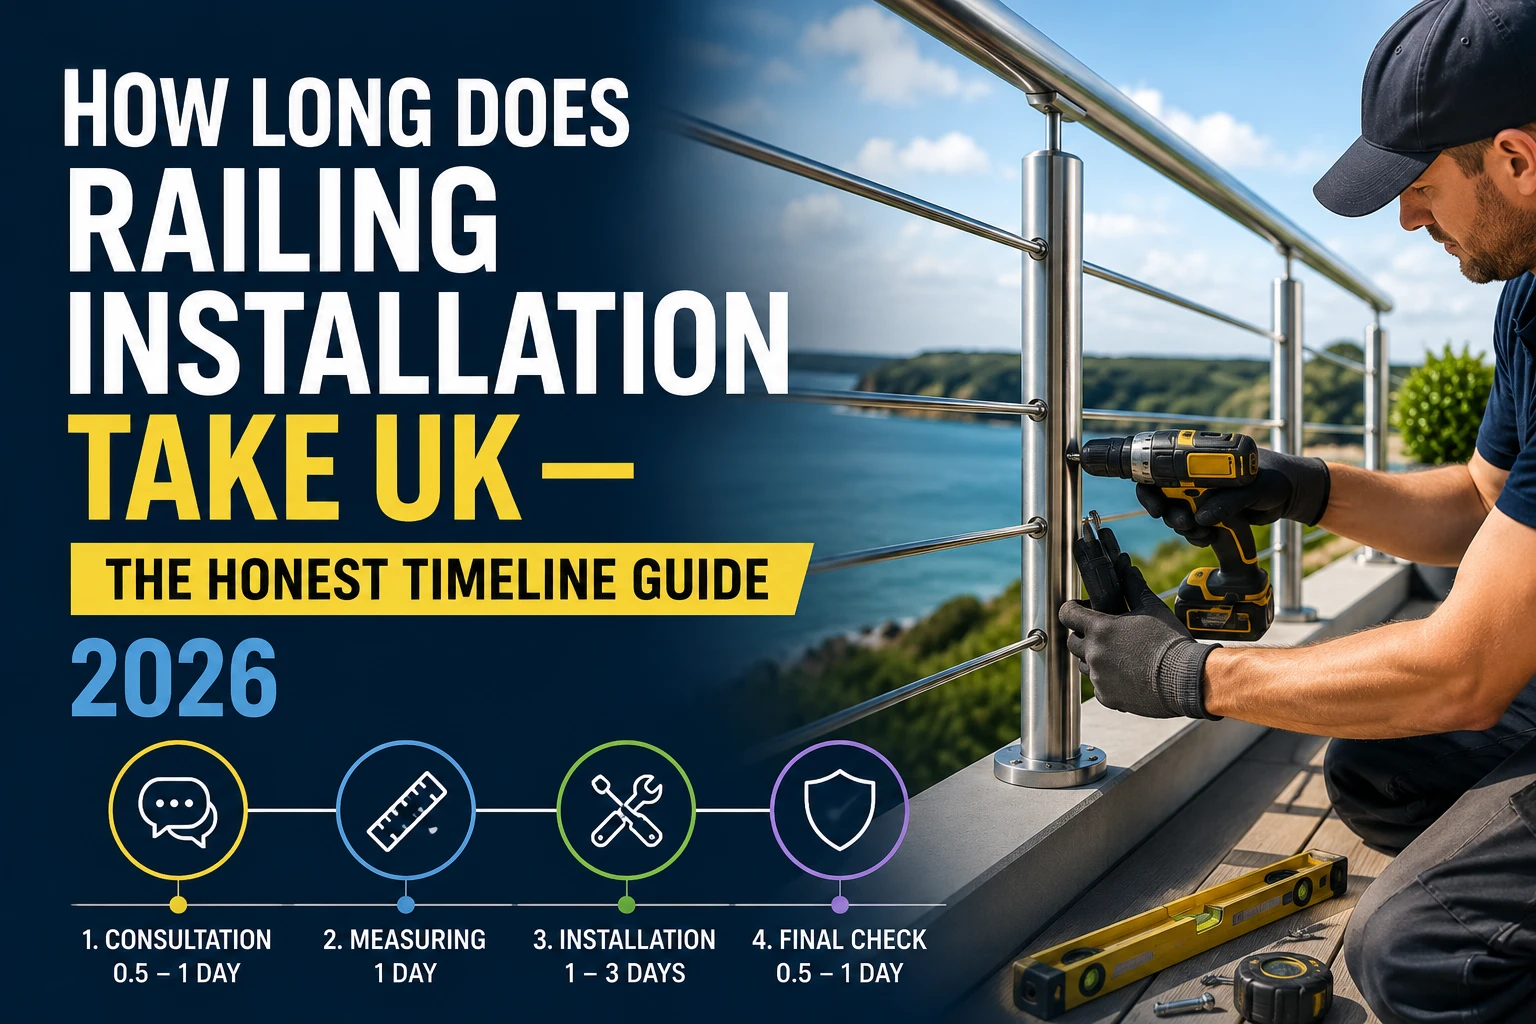
Here’s the complete picture for a typical bespoke residential balustrade in the south east of England:
Stage
Typical Duration
Initial enquiry and survey
3–7 days
Quote and design sign-off
3–10 days
Bespoke fabrication
3–6 weeks
Installation on site
1–3 days
Snagging and sign-off
1 day
Total from first call to finished railings
6–10 weeks
For off-the-shelf systems, remove the fabrication stage and you’re looking at 2–4 weeks total.
For commercial projects, add significant time at every stage.
The Bottom Line
How long does railing installation take UK?
The installation itself?
Half a day to a week, depending on scale.
The full process from first contact to finished installation?
Typically 6–10 weeks for bespoke work.
That’s the number to plan around.
Don’t let anyone tell you otherwise — and don’t leave it until you need them urgently.
The best fabricators in the south east are booked out.
Start early, decide fast, and get it in the diary before the rest of your project catches up.
Frequently Asked Questions
How long does railing installation take in the UK?
On-site installation typically takes half a day to 3 days for domestic projects, depending on the size and complexity.
A single wall-mounted handrail can be completed in 2–4 hours.
A residential garden balustrade or balcony railing usually takes 1–2 days on site.
Larger residential systems or commercial installations can take 1–3 weeks on site.
However, if your railings are bespoke — custom-fabricated to your specification — you also need to factor in a fabrication lead time of 2–6 weeks before installation even begins.
How long does it take from ordering bespoke railings to having them installed?
From the moment you confirm an order for bespoke metalwork, you’re typically looking at:
2–4 weeks fabrication for standard bespoke mild steel railings
3–5 weeks for stainless steel balustrades
4–6 weeks for glass balustrade systems
After fabrication, add 1–5 days on site for installation, depending on project scale.
In total, most bespoke railing projects in the UK take 6–10 weeks from initial enquiry to completion.
Does the type of material affect how long installation takes?
Yes — significantly.
Mild steel and standard metal railings are the quickest to install once on site.
Stainless steel systems require more care with fixings and alignment, adding time.
Glass balustrades take the longest on site — each panel needs to be handled with precision, and alignment is unforgiving.
Off-the-shelf modular systems can be installed the fastest because there’s no fabrication wait time.
Do I need to prepare my site before the installer arrives?
Yes — and this is one of the most overlooked things.
For the installation to proceed smoothly, you should ensure:
Any concrete post bases are prepped and in position
The working area is clear of other trades and materials
Access for the installation team and their vehicle is confirmed
The substrate (concrete, brick, timber decking) is structurally sound and complete
An installer arriving to a fully prepped site can start immediately.
If they arrive and the substrate isn’t ready, you’re either paying for waiting time or rescheduling.
Can weather cause delays to railing installation in the UK?
Yes — especially for outdoor and elevated installations.
Working at height in high winds is a safety risk and will stop work.
Heavy rain makes fixings harder to set correctly and creates slip hazards.
Frost can affect the curing of any concrete or resin-set fixings.
If your project is scheduled for autumn or winter, build weather contingency into your programme.
For urgent jobs, discuss sheltered or phased working options with your installer.
Do I need building control approval for railing installation in the UK?
For most straightforward domestic railing projects — garden railings, balcony balustrades, handrails — you don’t need a separate building control application.
Your installer is responsible for ensuring the work meets Approved Document K and BS 6180:2011 as standard.
Building control becomes involved when:
The railing is part of a larger notifiable building project
The property is a commercial or multi-occupancy building
Your local authority has specific requirements for the work type
Always check with your installer and, if in doubt, contact your local authority building control department before work starts.
How far in advance should I book a railing installer in the south east of England?
For bespoke railing projects in Kent, Surrey, Sussex, and the wider south east, I’d recommend booking at least 6–8 weeks in advance of your target installation date — ideally more.
The best fabricators in the region are often booked out 4–8 weeks ahead.
If your project has a fixed deadline — say, it needs to be complete before a property sale or a commercial handover — book even earlier and get a programme in writing.
For off-the-shelf systems with shorter lead times, 2–4 weeks advance notice is usually sufficient.
What’s the difference between fabrication time and installation time?
Fabrication time is the period when your railings are being made in the fabricator’s workshop.
For bespoke metalwork, this happens before the installer comes to your site and typically takes 2–6 weeks depending on the system.
Installation time is the time the team spends physically on your property fitting the railings — typically 1–5 days for domestic projects.
Most homeowners only think about installation time, but fabrication time is often the bigger factor in the total project timeline.
Understanding both is essential for planning how long does railing installation take in the UK — from first call to final sign-off.
But here’s where I see homeowners and even some contractors go wrong.
They pick the grade based on price — not location.
And six months later they’ve got rusty, tea-stained railings that look like they’ve been dragged out of a scrapyard.
I’ve seen it on seafront balconies in Brighton.
I’ve seen it on garden terraces in Canterbury.
And I’ve seen it on commercial developments in Guildford where a builder saved a few hundred quid on material and spent thousands putting it right.
That mistake?
Avoidable.
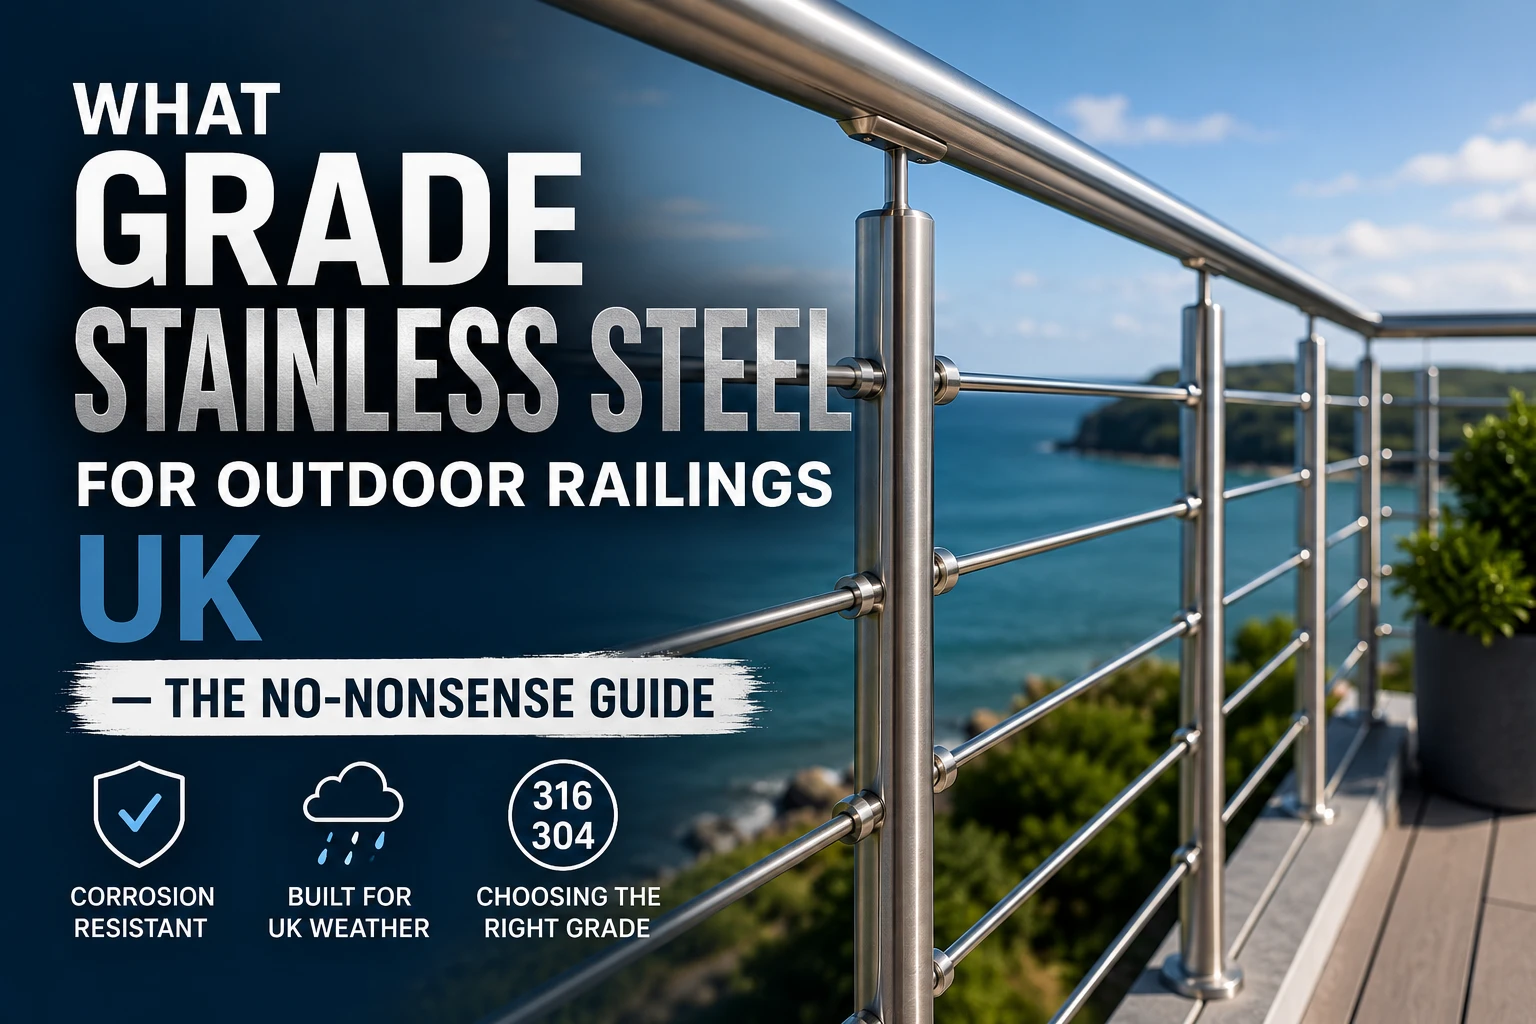
This guide tells you exactly what grade stainless steel for outdoor railings UK projects need — based on where you are, what the installation is for, and what your budget actually allows.
No jargon.
No waffle.
Just the truth.
The Three Grades You Actually Need to Know About
There are dozens of stainless steel grades out there.
But for outdoor railings in the UK, you only really need to understand three.
Everything else is either overkill or not fit for purpose outdoors.
Here they are:
Grade 304 — the everyday workhorse
Grade 316 — the marine-grade choice
Grade 2205 Duplex — the heavy-duty option
Let me break each one down properly.
Grade 304 Stainless Steel — The Popular One (But Not Always the Right One)
Grade 304 is the most common stainless steel in the world.
You’ll find it in kitchen appliances, handrails, indoor balustrades — it’s everywhere.
It contains roughly 18% chromium and 8% nickel, which is why it’s sometimes called “18-8 stainless.”
That mix gives it solid corrosion resistance in clean, dry environments.
Where Grade 304 Works Well
Inland residential gardens with moderate rainfall
Sheltered terraces or patios not facing prevailing wind
Urban areas away from traffic pollution and salt
Indoor staircases and mezzanine balustrades
Where Grade 304 Fails
And here’s where people get caught out.
The moment you put 304 in a salty, coastal, or high-chloride environment, its corrosion resistance drops off significantly.
Without molybdenum in its composition, it can’t fight off the pitting and crevice corrosion that salt air causes.
You’ll start seeing rust spots and staining — sometimes within a year.
So if you’re anywhere near the Kent or Sussex coast?
Don’t use 304 for your outdoor railings.
Grade 304 at a Glance
Property
Detail
Chromium content
18%
Nickel content
8%
Molybdenum
None
Best for
Inland, sheltered outdoor settings
Avoid for
Coastal areas, poolside, heavy pollution zones
Cost
Mid-range — most affordable stainless option
Grade 316 Stainless Steel — The Outdoor Standard for Most UK Projects
If 304 is the everyday option, 316 is the outdoor standard.
It’s the grade I’d recommend to the vast majority of homeowners and contractors across the south east of England.
UK Building Regulations — What the Rules Say About Materials
Quick note on compliance, because this matters.
Approved Document K sets out the rules for fall protection in England.
It doesn’t mandate a specific grade of stainless steel — but it does require that your balustrade or railing is:
Structurally sound and capable of withstanding required loads
Durable for its intended environment
Compliant with BS 6180:2011 (Barriers in and about buildings)
In practice, using the correct stainless grade is part of meeting that durability requirement.
A building control officer isn’t going to pull out a spectrometer on site.
But if your installation fails prematurely due to material choice, you have a compliance issue — and a liability one.
For commercial projects especially, get your material spec in writing before installation starts.
How to Spot the Grade of Stainless Steel You’ve Been Sold
This matters more than people realise.
Some cheaper suppliers sell 304 components labelled as 316 — particularly on fixings, posts, and brackets.
The problem?
You can’t tell the difference visually.
Here’s how to protect yourself:
Ask for a material test certificate (MTC) — any reputable supplier should provide one
Check mill markings on the steel if accessible
Buy from established UK fabricators with a verifiable track record
For coastal or commercial projects — insist on written confirmation of grade in the contract
If a supplier can’t produce an MTC, that’s a red flag.
Walk away.
Common Mistakes I See All the Time
Let me save you from the errors I’ve watched others make.
Mistake 1: Using 304 near the coast
The most common one. Looks fine on day one. Looks terrible by year two.
Mistake 2: Specifying the right grade but wrong finish
A rough or brushed finish traps more contaminants than a mirror polish.
For coastal installations, a polished or electropolished finish on 316 gives you the best chance of longevity.
Mistake 3: Using the right grade for posts but wrong grade for fixings
This is sneaky.
Your posts might be 316.
But if your fixings, bolts, and brackets are 304 or even zinc-plated steel — they’ll fail first.
Specify the entire system in the correct grade.
Mistake 4: Skipping maintenance entirely
Even 316 benefits from an annual rinse with clean water and a wipe-down to remove surface contamination.
In coastal areas, do it more frequently.
The Bottom Line
If you’re asking what grade stainless steel for outdoor railings UK projects need, here’s the short answer:
316 for most outdoor and coastal installations in the south east.
304 only for sheltered, inland settings where salt isn’t a factor.
2205 Duplex for extreme environments, high-load commercial work, or large glass balustrade systems.
Get the grade right from the start.
It’s the single decision that determines whether your railings look great in ten years — or embarrass you in two.
Frequently Asked Questions
What is the best grade of stainless steel for outdoor railings in the UK?
Grade 316 is the most widely recommended grade for outdoor railings across the UK.
It contains molybdenum, which gives it significantly better resistance to corrosion, salt, and chloride attack compared to 304.
For coastal areas — particularly along the Kent and Sussex coast — 316 is the minimum you should specify.
For extreme environments or high-load commercial projects, Grade 2205 Duplex offers superior performance.
Is Grade 304 stainless steel OK for outdoor railings?
Grade 304 can work in sheltered, inland outdoor settings away from coastal air and heavy pollution.
However, it lacks molybdenum, meaning it’s vulnerable to pitting corrosion in salty or chlorinated environments.
If your property is anywhere near the coast or has an exposed position, upgrade to 316.
The price difference rarely justifies the risk of premature corrosion.
What is marine-grade stainless steel?
Marine-grade stainless steel refers to Grade 316 (and its low-carbon variant, 316L).
The term “marine grade” reflects its suitability for environments with high salt and moisture exposure — like seafront properties, boat fittings, and coastal installations.
The British Stainless Steel Association (BSSA) recommends 316 for external balustrades near the coast.
How can I tell if my stainless steel railings are Grade 316?
Visually, you cannot distinguish Grade 316 from 304 with the naked eye.
The reliable way to confirm the grade is to request a material test certificate (MTC) from your supplier or fabricator.
For existing installations, a professional can carry out a chemical analysis or use an XRF (X-ray fluorescence) analyser to identify the grade on site.
Does grade of stainless steel matter for UK building regulations?
Building regulations (Approved Document K and BS 6180:2011) don’t prescribe a specific stainless grade, but they do require balustrades to be durable and structurally adequate for their environment.
Selecting an inappropriate grade for a coastal or exposed location could be considered non-compliant if the installation fails prematurely.
For commercial projects, always have material specifications confirmed in writing before installation.
What is Grade 2205 Duplex stainless steel used for in railings?
Grade 2205 Duplex is used where standard 316 doesn’t provide enough corrosion resistance or structural strength.
Common applications include:
Seafront and extreme coastal railings
High-load commercial balustrade systems
Large-span glass balustrade installations
Public-facing staircases and walkways with heavy footfall
It has nearly twice the yield strength of 316L, which allows for thinner-section components while maintaining performance.
How much more does Grade 316 cost than Grade 304 for railings?
The cost difference between 304 and 316 stainless steel railings is typically in the range of 10–20% for the materials alone.
On a standard domestic garden railing installation, that might equate to a few hundred pounds.
When you factor in the cost of replacement or remediation if a lower grade fails prematurely — particularly in coastal areas — the upgrade to 316 is almost always the better value decision long-term.
Do I need to maintain stainless steel outdoor railings?
Yes — even 316 stainless steel benefits from periodic maintenance.
For most inland installations, an annual clean with warm water and a mild detergent is sufficient.
For coastal properties in the south east, clean more regularly — every few months — to remove salt deposits before they cause surface staining.
Avoid abrasive cleaners or steel wool, which can damage the passive oxide layer that gives stainless steel its corrosion resistance.
Based in the North East of England, Hazelrigg Enterprises has earned a strong reputation for exceptional service and reliability in both property development and industrial machinery supply. With decades of experience and a forward-thinking approach, we’re proud to offer tailored solutions for clients across the UK and around the world — helping businesses and individuals alike achieve more.
Commercial and Private Property Services
At Hazelrigg Enterprises, we bring creativity and precision to every property project. Our team has extensive experience sourcing, developing, and enhancing residential and commercial properties, always with a focus on adding measurable value.
Whether you’re a private owner looking to unlock potential in existing assets or a business exploring expansion opportunities, our bespoke property services are designed to meet your specific goals. From uncovering hidden value in underutilized spaces to executing high-return developments, innovation drives everything we do.
You can explore our current Plant and Equipment listings and browse client testimonials that highlight the results we consistently deliver.
Industrial and Commercial Machinery Supply
Finding the right machinery — especially specialist or hard-to-source equipment — can be a challenge. That’s where Hazelrigg Enterprises stands out. Our extensive global network allows us to source and supply machinery for industries including shipping, port operations, energy, and infrastructure.
Whether you need a gas generator in Turkey or a crane for a UK infrastructure project, we make it happen. Backed by decades of experience, our team ensures swift sourcing and delivery for even the most complex requests, turning equipment procurement into a seamless experience.
Plant and Equipment
Our constantly updated selection of plant and equipment features high-quality assets for businesses of every scale — from modern aircraft and cranes to generators, tower lights, marinas, and transporters. Each listing on our website is carefully chosen for reliability, performance, and value.
Don’t see what you’re looking for? Our sourcing specialists can locate it quickly through our trusted network, handling everything from procurement and documentation to shipping. Whatever your requirements, we provide an end-to-end service that makes acquiring machinery effortless.
Why Choose Hazelrigg Enterprises?
Experience, dedication, and global reach set Hazelrigg Enterprises apart. Our long-standing expertise has made us a trusted partner for companies and individuals seeking high-quality, cost-effective property and machinery solutions.
We believe in a personal, client-first approach — ensuring you receive attentive support from your initial enquiry through to project completion or equipment delivery. For us, every challenge represents an opportunity to innovate and exceed expectations.
Ready to see what we can do for you? Explore our current machinery inventory, discover our property projects, and learn why clients around the world choose Hazelrigg Enterprises for reliability, quality, and service excellence.
A Scandinavian district-energy plant venting 90 °C process water once considered it too low for meaningful recovery. Kaltra installed microchannel heat exchangers that extract 250 kW of duty and heat incoming make-up water from 40 °C to 70 °C, cutting boiler gas consumption 18 % annually. The units employ flat aluminum multi-port tubes arranged in a true counter-flow pattern. Each tube contains ninety ports 0.7 mm wide, creating internal surface densities above 1 500 m² m⁻³ and pushing overall heat-transfer coefficients beyond 5 kW m⁻² K⁻¹ for water-to-water duty. The result is a microchannel heat exchanger that achieves 3 K approach temperature in 40 % less footprint while keeping water-side pressure loss below 25 kPa, so existing pumps need no upgrade. Kaltra vacuum-brazes every joint at 600 °C under nitrogen, fusing tube and fin into a single aluminum block rated 30 bar and 200 °C. The monolithic core passes 650 h neutral salt-spray without pitting, giving the microchannel heat exchanger a 20-year design life in coastal or urban atmospheres without protective coatings. Weight drops by 200 kg per 500 kW section, allowing roof-mounted skids to remain within original load limits.
Counter-Flow Core Lifts Make-Up Water from 40 °C to 70 °C without Pump Upgrade
For sites where chloride exceeds 1 mg m⁻³, fins can receive 12 µm cathodic epoxy through an electrophoretic process that survives 2 000 h salt-spray yet adds only 3 Pa extra pressure drop, so capacity derating is unnecessary. Kaltra https://www.kaltra.com/microchannel-heat-exchangers sizes each unit through an AI portal trained on 50 000 laboratory tests. Enter hot and cold flow rates, approach temperature and footprint; validated effectiveness, pressure drop and live price are returned in sixty seconds, together with STEP and ERP export files. Production capacity reaches one million cores per year across facilities in Graz and Plzeň, with fourteen vacuum-brazing furnaces operating 24/7. Standard lead time is ten working days; emergency batches ship in seventy-two hours, pressure- tested to 52 bar and dried to −40 °C dew point. By converting low-grade waste heat into usable energy, plants cut fuel bills and CO₂ emissions in a single upgrade, proving that microchannel heat exchangers are the quiet heart of modern energy recovery.